Key learning elements:
» Run experiments in Google Colab and access files on Google Drive
» Build and evaluate a model using Tensorflow Eager mode
» Build a Convolutional Neural Network (CNN) to recognize 7 facial expressions
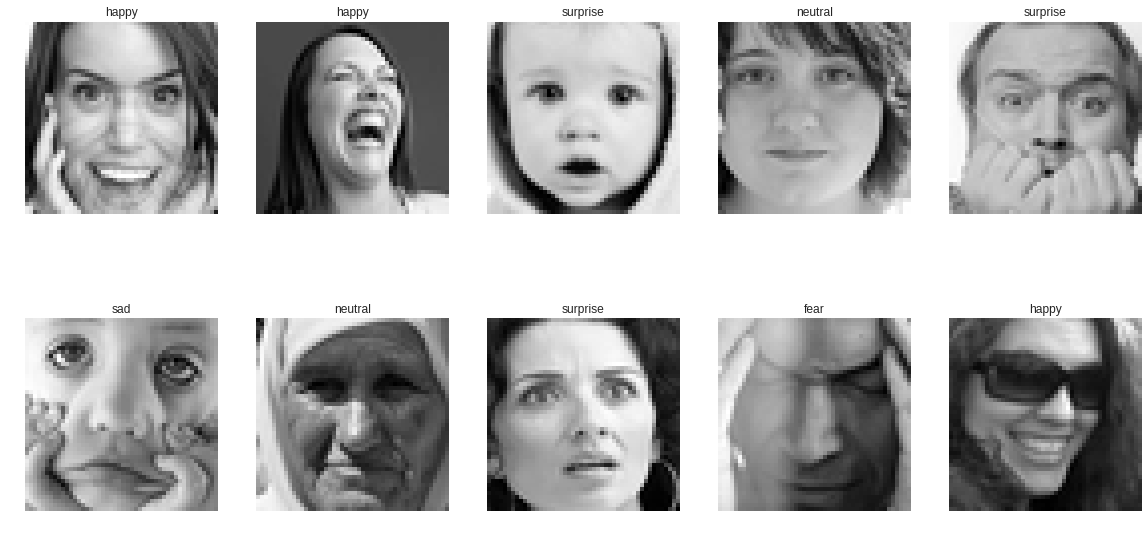
For this exercise we are going to build a CNN for facial expression recognition on fer2013 dataset, available on Kaggle. fer2013 is a publicly accessible, and it contains 35,887 grayscale, 48 x 48 sized face images with 7 emotional expressions: angry, disgust, fear, happy, sad, surprise, and neutral. It was originally published on International Conference on Machine Learning (ICML) 2013, Challenges in Representation Learning: A report on three machine learning contests, Ian Goodfellow et al., 2013
We will build and train models on Google Colab, a free Jupyter notebook environment that runs on Google cloud and gives FREE GPU! It is like a dream comes true 🙂 For more information on Colab, check Colab official page and give it a try. Here is a great tutorial on Google Colab by Fuat.
Eager mode was introduced to the Tensorflow framework in TF 1.7. Unlike its predecessor, it allows imperative TF execution without building any graph, which is so convenient for building and evaluating neural networks using TF. Google has a nice tutorial on Eager mode.
Let’s get down to business and do some Python coding.
Import the libraries.
import sys, os
from datetime import datetime
import pandas as pd
import numpy as np
import matplotlib.pyplot as plt

import tensorflow as tf
import tensorflow.contrib.eager as tfe
Enable TF Eager mode. It needs to be activated only once at the beginning, and can be turned off by starting a new session.
tfe.enable_eager_execution()
Now I have a problem: how to load the training data file stored in my Google Drive into Colab? In a non-Colab environment, a local data file can be easily loaded by using Pandas’ read function. However, as we are using Google’s cloud platform, certain libraries and permissions must be set up properly before we can continue.
Following this Google tutorial, run the following code to install necessary libraries and run authorization to Google Drive.
# Install a Drive FUSE wrapper.
!apt-get install -y -qq software-properties-common python-software-properties module-init-tools
!add-apt-repository -y ppa:alessandro-strada/ppa 2>&1 > /dev/null
!apt-get update -qq 2>&1 > /dev/null
!apt-get -y install -qq google-drive-ocamlfuse fuse
# Generate auth tokens for Colab
from google.colab import auth
auth.authenticate_user()
# Generate creds for the Drive FUSE library.
from oauth2client.client import GoogleCredentials
creds = GoogleCredentials.get_application_default()
import getpass
!google-drive-ocamlfuse -headless -id={creds.client_id} -secret={creds.client_secret} < /dev/null 2>&1 | grep URL
vcode = getpass.getpass()
!echo {vcode} | google-drive-ocamlfuse -headless -id={creds.client_id} -secret={creds.client_secret}
It installs several packages and shows two URLs at the end. Click the URLs, follow steps to give Google Cloud SDK access to Google Drive, copy the generated code and paste it back in Colab notebook output. It should be something like this:

Now mount Google Drive:
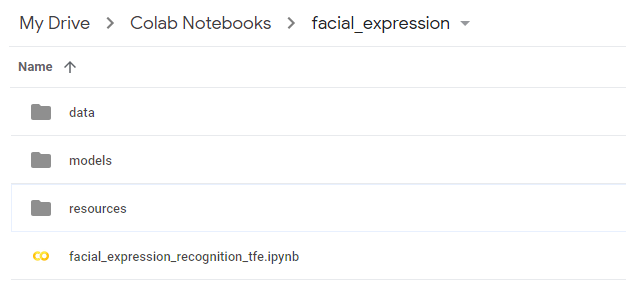
# mount Google drive
!mkdir -p drive
!google-drive-ocamlfuse drive
basepath = 'drive/Colab Notebooks/facial_expression'
sys.path.insert(0, basepath)
os.chdir(basepath)
After then, upload fer2013.csv data file to Google Drive project folder. My project folder looks like this and data file is saved in the data folder.
We can define some file paths:
# define file paths
datafile = './data/fer2013.csv'
Initialize the parameters. We will feed the CNN with the images in batches, each containing 64 images (size of 48 x 48). We will train in 100 epochs.
# initialize parameters
width, height = 48, 48
num_epochs = 50
batch_size = 64
dropout_rate = 0.3
Finally we are ready to read in the data and make some analyses.
# read data
data = pd.read_csv(datafile)
Let’s take a look some examples
data.head(5)

Image pixels are stored as a string of integers, each representing the intensity of one pixel. We need to convert it to a list of integers.
# convert strings to lists of integers
data['pixels'] = data['pixels'].apply(lambda pixel_sequence: [int(pixel) for pixel in pixel_sequence.split()])
Plot some sample images.
random_seed = 8
# randomly select 16 images
image_sample = data.sample(16, random_state=random_seed)

# Create subplots for images
_, axs = plt.subplots(4, 4, figsize=(10,10))
axs = axs.ravel()
i = 0
for _, row in image_sample.iterrows():
    one_image = np.array(row['pixels']).reshape(width,height)
    axs[i].imshow(one_image, cmap='gray')
    axs[i].set_title(emotion_map[row['emotion']])
    axs[i].axis('off')
    i += 1

Next, we split the dataset in training and validation, reshape it to proper dimensions and normalize with max pixel value 255.
# training data
data_train = data[data['Usage']=='Training']
# reshape image data (num of images, width, height, num of channels)
x_train = np.array(data_train['pixels'].tolist(), dtype='float32').reshape(-1,width,height,1)/255.
# get labels
y_train = data_train['emotion'].as_matrix()

# validation data
data_val = data[data['Usage']!='Training']
# reshape image data (num of images, width, height, num of channels)
x_val = np.array(data_val['pixels'].tolist(), dtype='float32').reshape(-1,width,height,1)/255.
# get labels
y_val = data_val['emotion'].as_matrix()

x_train.shape, y_train.shape, x_val.shape, y_val.shape
((28709, 48, 48, 1), (28709,), (7178, 48, 48, 1), (7178,))
Perfect! We have successfully split our data and transformed it to proper shapes. We are ready to build a CNN using Tensorflow.
The original CNN was implemented here in Keras. Some highlights of the architecture:
• 12 hidden CNN layers, each followed by a BatchNormalization layer except the last one.
• Use ReLU as activation function.
• Dropout rate is 0.3.
Using TF Eager mode, we can print and monitor our neural network performance at each epoch. Here is the output:
Train Epoch 000: Loss: 1.591, Accuracy: 37.748%
Valid Epoch 000: Loss: 1.598, Accuracy: 38.144%
----------------
Train Epoch 010: Loss: 1.115, Accuracy: 58.107%
Valid Epoch 010: Loss: 1.206, Accuracy: 53.845%
----------------
Train Epoch 020: Loss: 0.990, Accuracy: 62.810%
Valid Epoch 020: Loss: 1.145, Accuracy: 56.367%
----------------
Train Epoch 030: Loss: 0.920, Accuracy: 65.603%
Valid Epoch 030: Loss: 1.131, Accuracy: 56.952%
----------------
Train Epoch 040: Loss: 0.822, Accuracy: 70.232%
Valid Epoch 040: Loss: 1.089, Accuracy: 59.404%
----------------
Train Epoch 050: Loss: 0.782, Accuracy: 72.232%
Valid Epoch 050: Loss: 0.979, Accuracy: 62.154%
----------------
----- Start time: 2018-08-25 06:09:12.266674 End time: 2018-08-25 15:51:12.874568 Runtime: 9:42:00.607894 ---
Training 50 epochs on Google free GPU took about 10 hours and it reached 62.15% accuracy on validation data. To improve the result, we could add more CNN layers, increase dropout rate, and run more epochs. The complete code can be found on GitHub.